Successful status restriction via IPN

The default is for this option to be left blank.

Successful status restriction via IPN - Is there to stop a PayPal IPN changing a status of an order to the Successful transactions status if it is not one of the configured statuses (it does not have to be set - but read further as to why you might want to set something)

When an order is made and confirmed for final payment, VM stores the order and sets the status as a P.  This happens to all orders regardless of the payment method. Why? Well an order has to be saved with a status and P has been choesen (referred to as Pending - but can be thought of as a stored order, that is yet to have any payment attempted.)

Dont get this confused with Pending transactions, which is configured above - That setting is used for cases where the transaction has not completed payment at PayPal.

It is possible (and has been seen by many PayPal merchants) that PayPal do not sent through IPN messages for orders (due to some unknown PayPal glitch and usually temporary).

During these "glitches" orders in VM would not have their statuses changed from status 'P' - Merchants will often check for a payment being made or be told by a customer that a payment has been made - so Merchants check their PayPal account, see a payment has been made and decide to ship the goods - and the order status is manually changed to "fulfilled".

Then (potentially days later) the "delayed" IPN's may be sent by PayPal (which is unusual - but can occur.)

The most simple option is to set Pending (actually a status - P)

By doing this a Successful transactions status will only be allowed by an IPN "completed payment" message" - when the order is at status P (VirtueMart Pending)

The purpose of this setting is to stop delayed IPN's incorrectly setting order statuses to the Successful transactions status: for example, a "Shipped status" order back to a Successful transactions status.

 

Testing with the Payflow gateway

This article is based on the Testing with the Payflow gateway page. Some comments and screen shots have been added to help you.

Follow the steps as described here: Testing with the Payflow gateway PayPal page

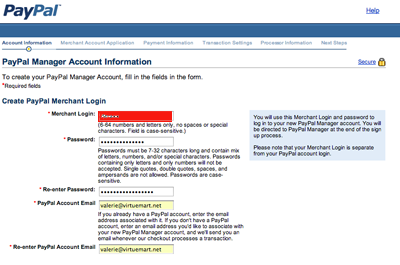
Part I: Creating a test-only Payflow account

Hosted-registration

Once, your account is created, your Payflow test credentials are:

  • Payflow vendor: the Merchant Login used during registration
  • Sandbox Payflow partner: PayPal


Part II: Creating a UK Business account in the sandbox

Get PayPal Sandbox Credentials

Part III: Setting up the manager

  1. Log in to https://manager.paypal.com

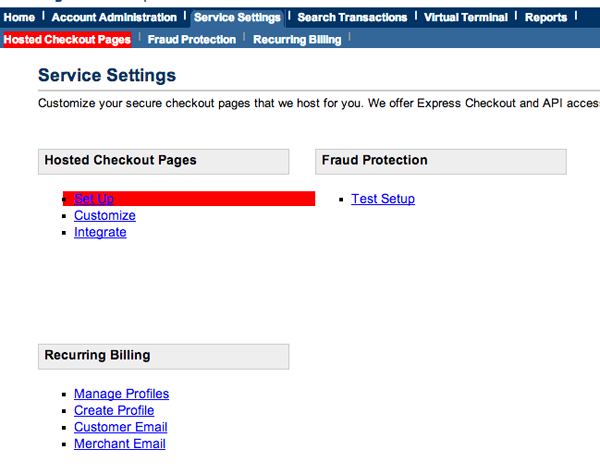
  2. go to Service Settings => Hosted Checkout Pages => Set Up.Hosted-Checkout-Pages
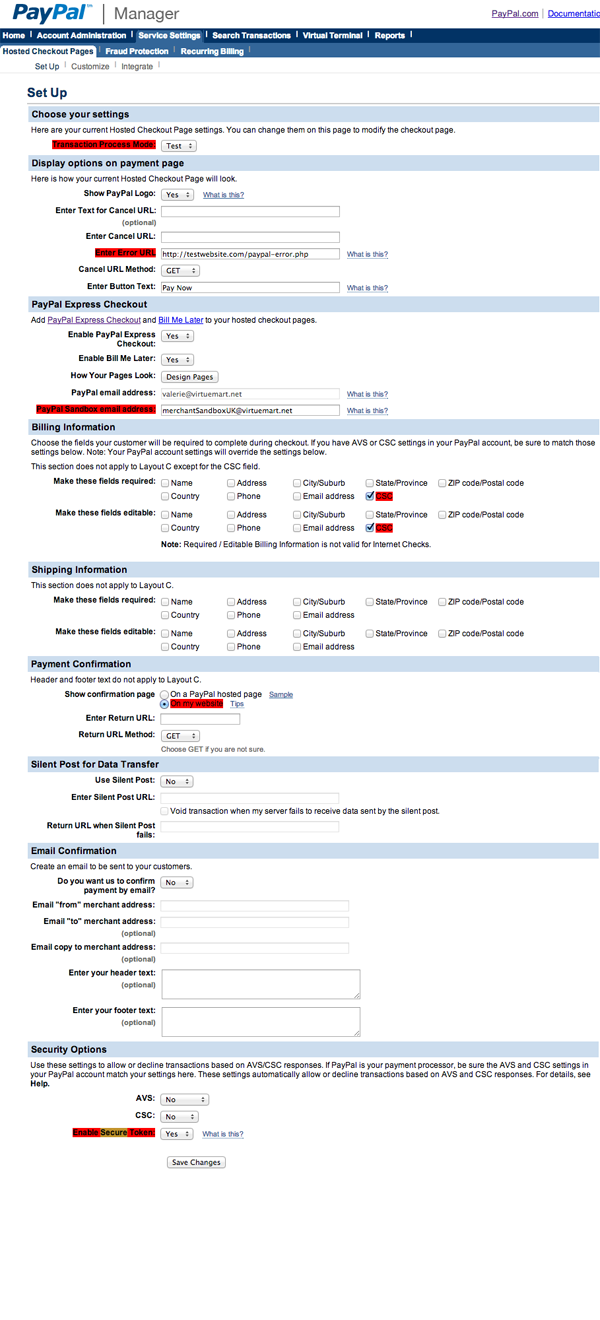
  3. Verify that Transaction Process Mode is set to "Test".
  4. For Error URL, enter a placeholder such as http://there.was.an.error (secure token API can override this; see the demo code at the end of this guide)
  5. Under "PayPal Express Checkout", paste your UK Business account email from PART II into the "PayPal Sandbox email address" field. This is the most vital step! If the email is missing, or if there are spaces after it in the textbox, testing will produce an "Invalid Merchant Configuration" or "PayPal Express Checkout is not set up on this account!" error
  6. Under Billing Information => "Make these fields required", check the box next to CSC. Do the same under "Make these fields editable."
  7. Under Payment Confirmation, change "Show confirmation page" to "On my website".
  8. At the very bottom, change "Enable Secure Token" to "Yes"
  9. "Save Changes"
    Hosted-Checkout-Setup
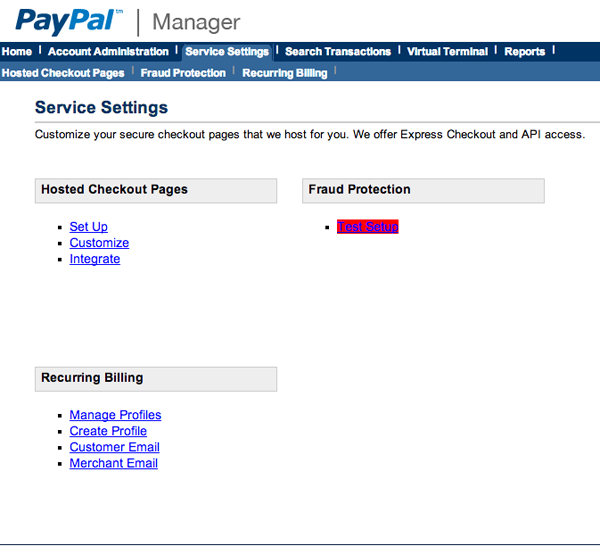
  10. Go to Service Settings => Fraud Protection => Test Setup => Edit Standard Filters
    fraud-protection-link
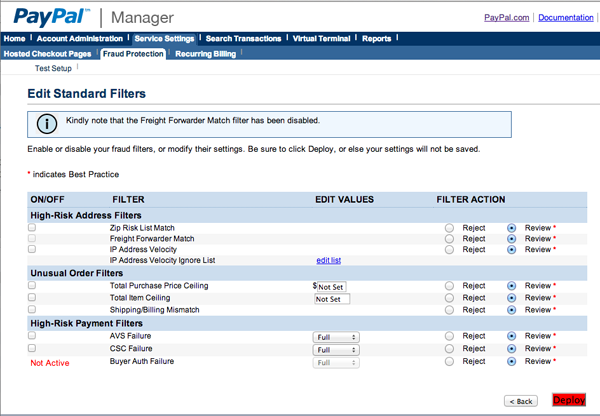
  11. Uncheck all the boxes on the leftmost column, and "Deploy".


Fraud-deploy

Upgrade Business account to PRO

  1. Connect to the PayPal Developer Website
  2. Click on Applications on the horizontal bar
  3. And then on Sandbox Accounts on the left menu
  4. Click on the arrow next your Sandbox business account email address,
    sandbox-arrow
  5. and then click on the Profile link that appears below the email address. 
    sandbox-profileThis opens the Sandbox account details window.
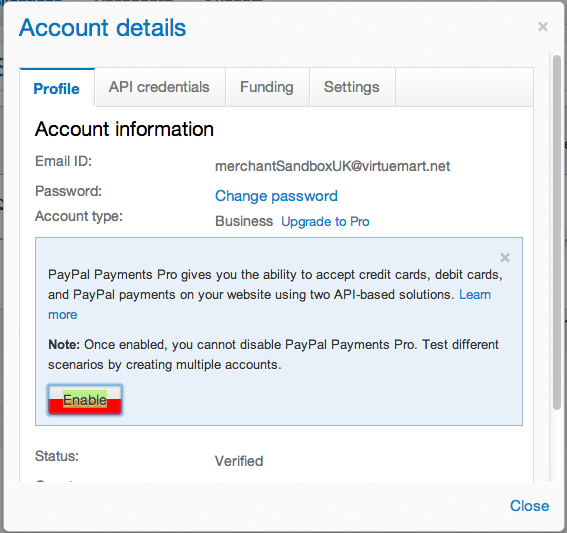
  6. In the window Account details, from the Profile tab of this window, select Upgrade to Pro. Then click the Enable button.
    upgrade-pro-enable
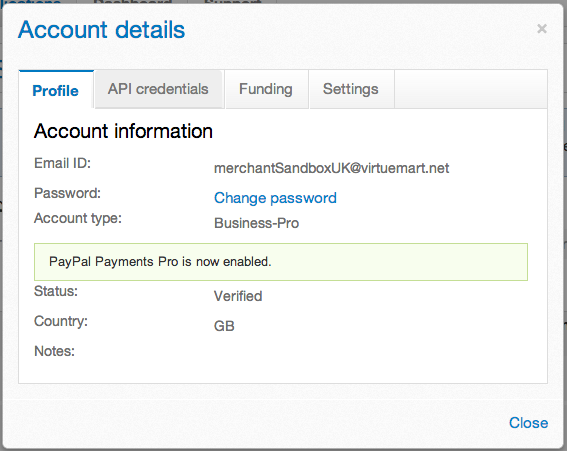
  7. Click on Close. Your Sandbox Business Account has been upgraded
    business-pro

Sandbox Merchant Email

When the parameter Do you have a business account? is set to Yes, enter the email address to start accepting Express Checkout payments.

Do you have a business account?

If the merchant does not have yet a business account, set this option to Yes. With this option, the merchant can start accepting Express Checkout payments, and do not need to have a PayPal account.

More  about Accelerated Boarding option.